This explains the process of developing an iPhone app using UniPy. This is a tutorial for beginners.
First, you need to have Xcode,
VSCode, and UniPy installed.
Xcode and UniPy can be installed from the App Store.
Please download and install VSCode (Visual Studio Code) from
the official VSCode website.
If you want to use a different editor, feel free to use a different editor.
The use of VSCode is not required to use UniPy.
Please replace the explanation for VSCode with the editor you are using.
First, create a project in Xcode, just like when developing a normal iPhone app using Swift.


Since we are creating an iPhone app this time, select "iOS" and "App" and click "Next".

Enter the name of your app in "Product Name:"
Here, we will assume that the app name is "MyUniPyApp".
For "Team:" and "Organization Identifier:", please enter your own ID or email address or other identification ID.
(If you don't know how to do it, please refer to the information on the Xcode explanation site.)
To proceed with development using UniPy, you must select
"Interface:" as "SwiftUI" and "Language:" as "Swift"!

Specify the location where you want to save the project (here we use "~/Projects/").
When you click "Create", the following screen will appear.
(The screen configuration may differ from the screenshot below depending on the version and settings of Xcode.)
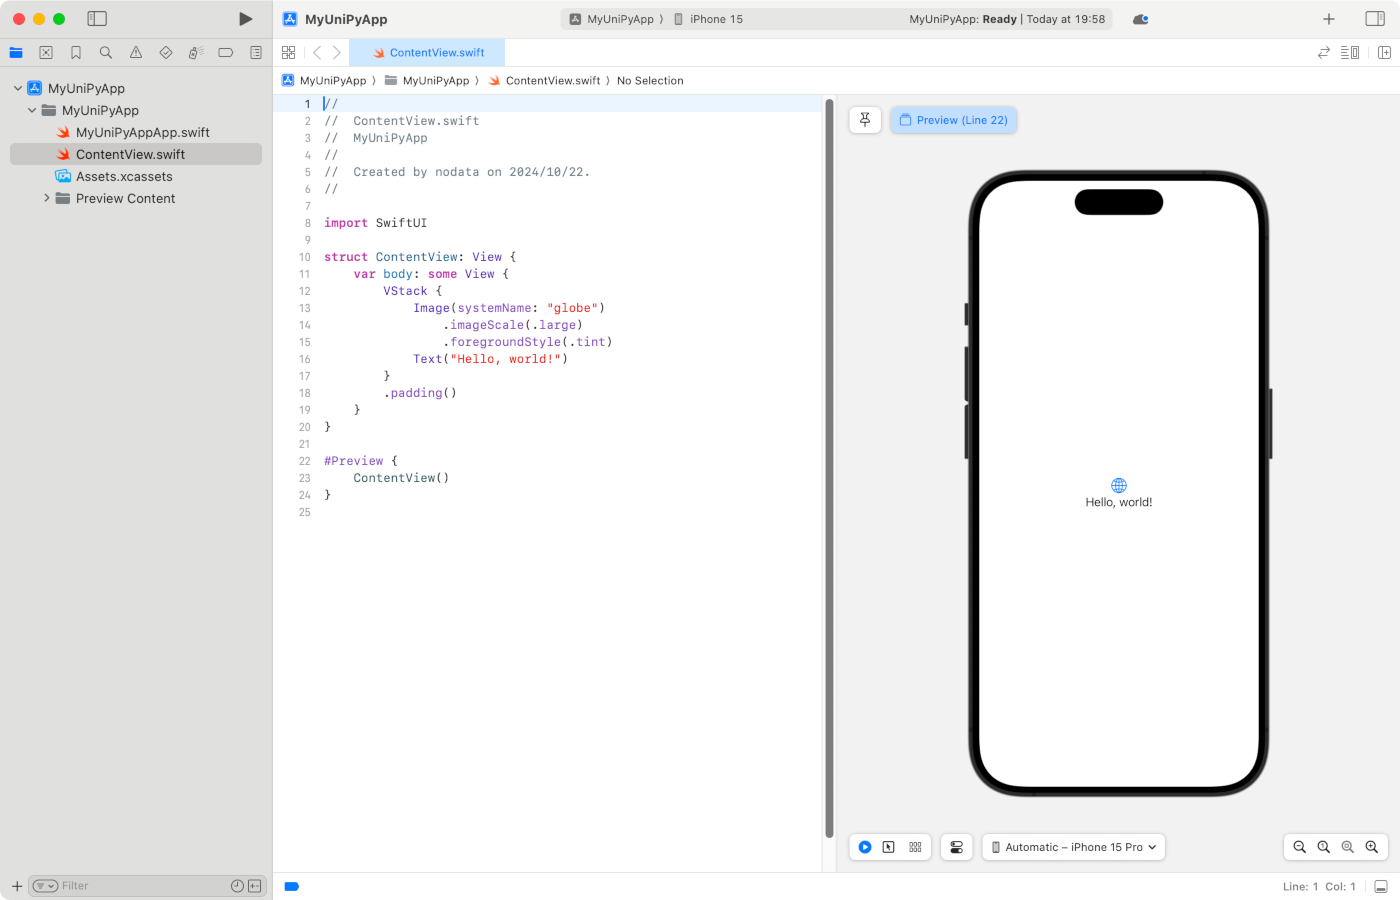
You have successfully created a project for your app in Xcode.
If you were normally developing with Swift, you would edit this ContentView.swift,
but we will be developing with UniPy,
so the next step is to create a project in which we can write the Python code.
In this tutorial, we will use VSCode as the IDE (editor) to write Python code.
(For information on how to use VSCode, please refer to the VSCode official website or other sites.)
In order to use features such as IntelliSense, we recommend that you install the VSCode add-on "Python extension for Visual Studio Code" . Additionally, installing "Mypy Type Checker" and "Flake8 extension for Visual Studio Code" will help you find syntax errors.

Create a suitable folder as a VSCode project folder and open it.
(Here we used "~/Projects/MyUniPyApp-VSCode/")
(In VSCode a project is just a folder)
Create a Python file that will eventually become your Swift code.
That said, it's no different to a normal Python file, and you create it as a normal Python file in VSCode.
(Here, the file name is "my_unipy_app.py")
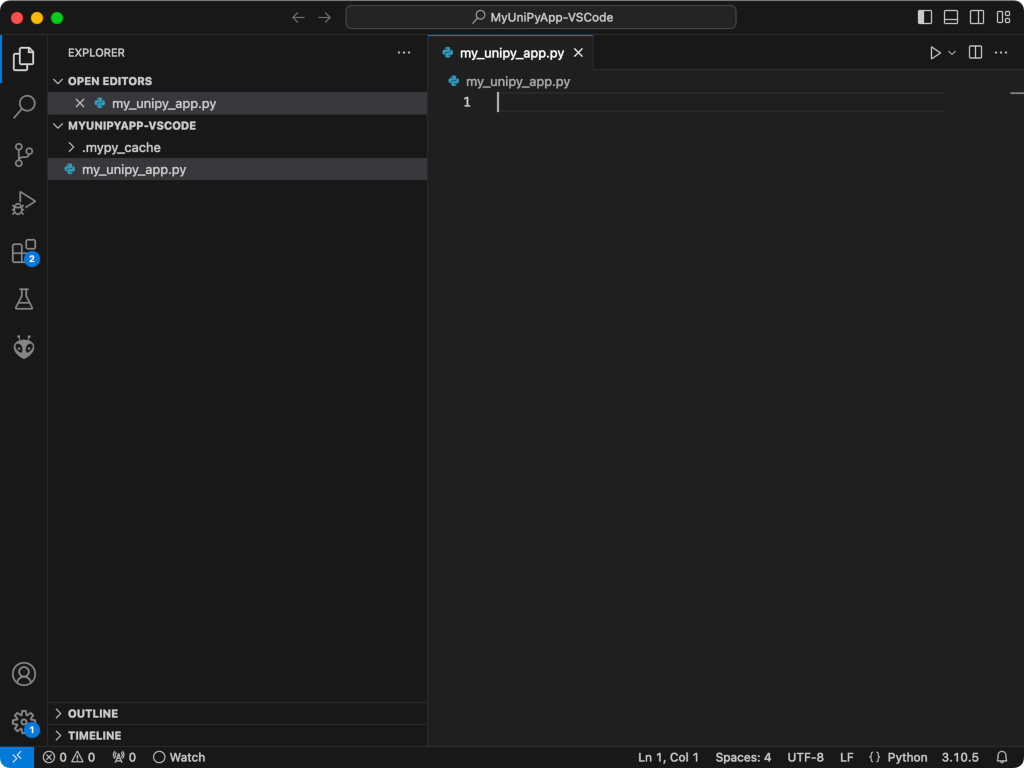
We will edit this file to create the app,
but before that,
we will first export the files we will need from UniPy.
Open the "Settings" tab of the UniPy app.
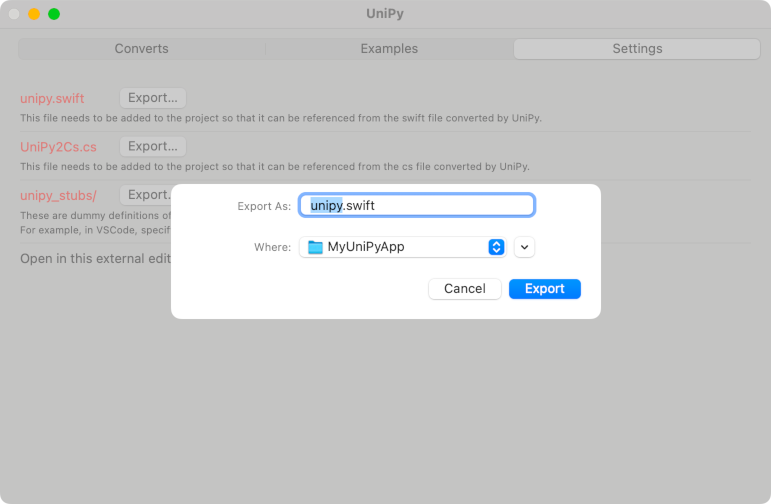
Click unipy.swift “Export…”.
A dialog box will appear asking you to specify the export destination, so export to a suitable location.
(Here, we use "~/Projects/MyUniPyApp/MyUniPyApp/unipy.swift")
Next,
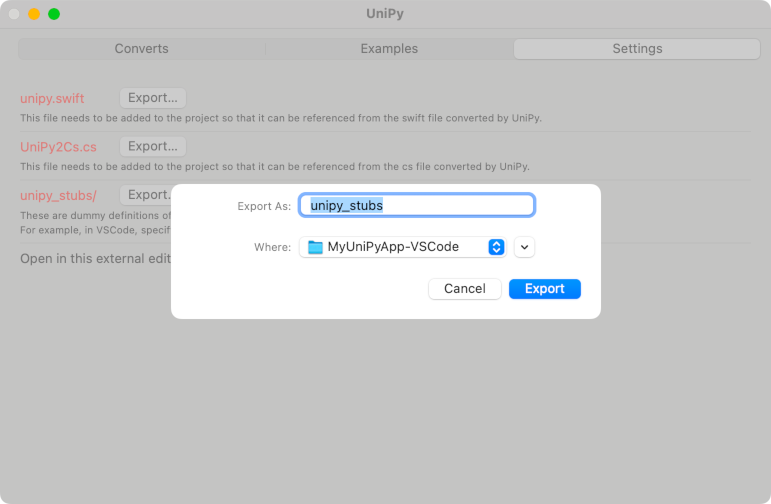
Click unipy_stubs/ “Export…”.
Similarly, a dialog box will appear allowing you to specify the export location.
You can choose any location, but to enable IntelliSense, the path must be included in
'python.analysis.extraPaths'.
It's easiest to put it in the top folder of your project, which has a default path.
So here I set it to "~/Projects/MyUniPyApp-VSCode/unipy_stubs".
Go to Xcode.
You need to add the unipy.swift file you just exported to your project.
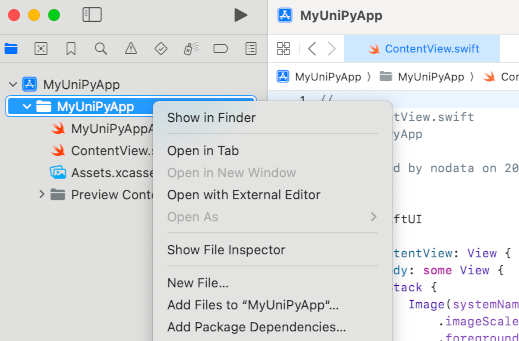
Right-click on the list on the left side of the window and click "Add Files to "Project Name"...".

Select unipy.swift from the exported location and click “Add”.
Go to VSCode.
Make sure the unity stubs/ directory you just exported is there.

from unipy_stubs import *Now you're ready to start writing your app‼️
You can now go ahead and edit "my_unipy_app.py" as you like,
but for now in this tutorial,
we will create the app by copying and pasting the sample code that comes with the UniPy app.
Open the "Examples" tab of the UniPy app.
Now, let's copy and paste the "Form code example".

Click "Open the code: py".
By default, the code will open in TextEdit.app (you can change this in the "Settings").
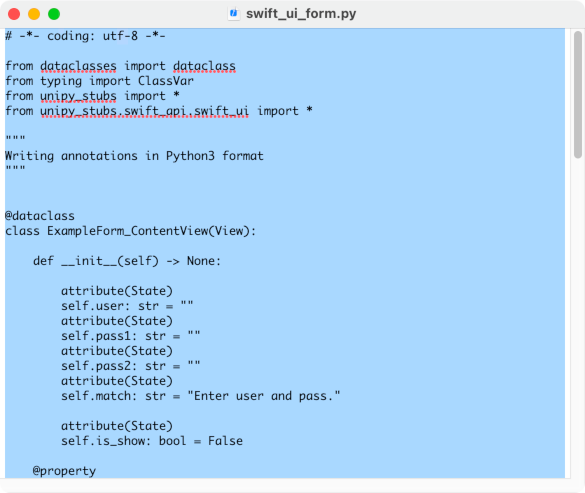
Copy the code that opens, go to VSCode and paste it into "my_unipy_app.py".
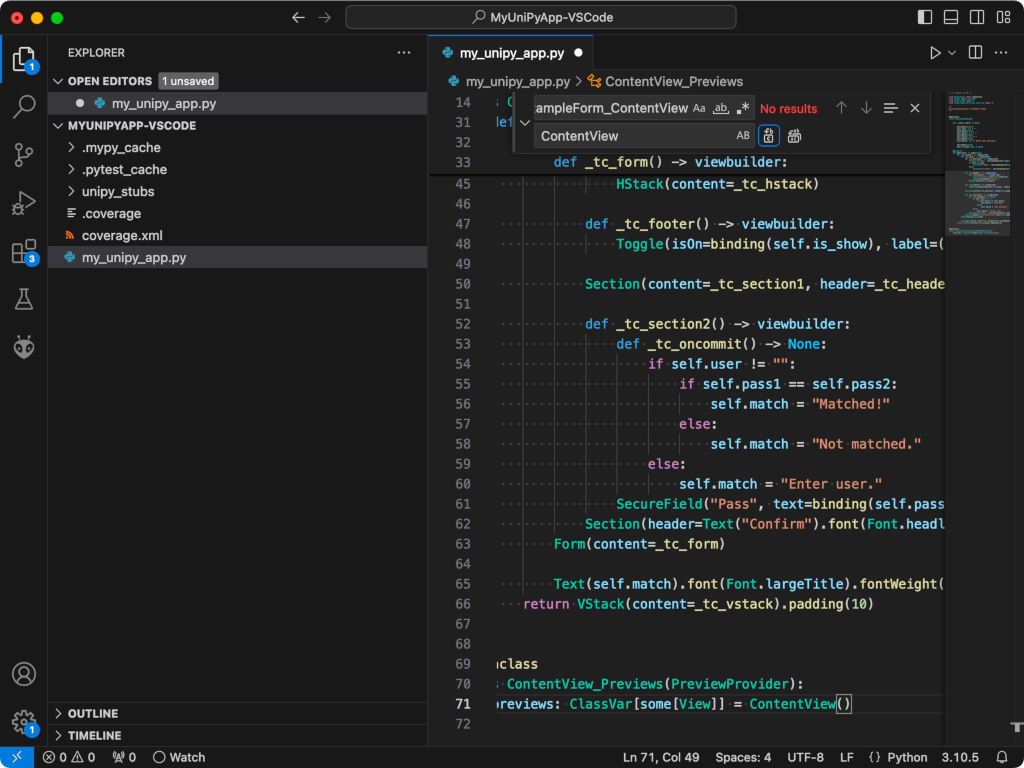
Now let's finally try the conversion process using the UniPy app.
Open the "Converts" tab of the UniPy app.

Click "Specify the source file to convert...".

Select and open the “my_unipy_app.py” file created above.
(Here, "~/Projects/MyUniPyApp-VSCode/my_unipy_app.py")

Make sure the "Swift" and "C#" toggle switches are set to "Swift" and
click "Specify the destination file...".

Replace the default ContentView.swift file in your Xcode project.
(Here, "~/Projects/MyUniPyApp/MyUniPyApp/ContentView.swift")

Click the Convert button. (The code is short this time, so the process will be completed in an instant.)
Go to Xcode.
You can confirm that the contents of ContentView.swift have been rewritten.

The preview screen is already displayed, but let's try running it in the simulator ▶️.
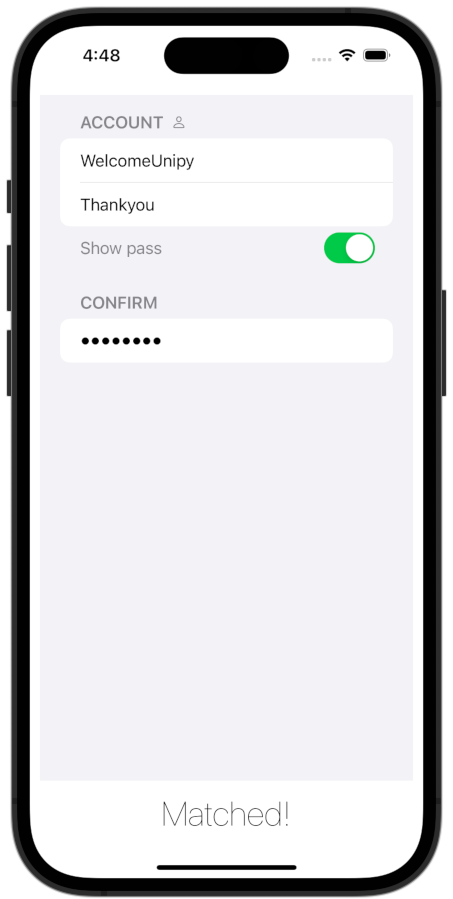
It worked ❤️
1️⃣(With VSCode) Edit (add, modify) the Python source
2️⃣Convert with UniPy
3️⃣Check the conversion results (errors) with Xcode
Please use UniPy to complete your app and distribute it on the app store✨