| OS | : | macOS Monterey(12.3) or later |
| Chip | : | Intel, Apple Silicon (M1 or later) |
| Memory | : | Minimum 200 MB (increase depending on number of tasks to be registered) |
| Disk | : | minimum 100 MB (increase depending on number of tasks to be registered) |
The maximum number of tasks to be registered is expected to be less than 10,000 in total, and less than 1,000 for each project.
Basic Operation 1
- Click "Project settings" from the navigation list on the left side of the application screen. (Switch to the Project settings screen)
-
In the frame in the center of the application screen,
Enter the "Project name". (also used for the folder name when saving data)
Click on "Project color" to display the color panel and select the color of your choice.
(The color will be used to represent this project in the work status bar, etc.)
The "Sum groups" is a free input. Multiple entries can be separated by ,(comma).
If you uncheck the "Is reflect to calendar app" checkbox,
Even if the setting turned on in the other settings screen, it will not be reflected for this project. -
Click the "Add" button when you have completed the entry.
(The entered data will be displayed as rows in the table view at the top of the application screen.)
This completes the "Add new project" process. Thank you.
(The "Project name" you added should appear in the navigation list on the left side of the app screen)
- Click "Project settings" from the navigation list on the left side of the application screen. (Switch to the Project settings screen)
- Click on the row of the project you wish to edit from the table view at the top of the application screen.
-
The data of the selected project will be displayed in the frame in the center of the application screen,
Edit the contents of the item you wish to change. (See "Add new project" for a description of each item) -
When editing is complete, click the "Upd" button.
(The Update data will be reflected in the row of this project in the table view at the top of the app screen.)
This completes the "Update project" process. Thank you.
To cancel editing
Do not click the "Upd" button,
Click on any other project row in the table view above the application screen, or go to any other screen from the Project settings screen.
Click on any other project row in the table view above the application screen, or go to any other screen from the Project settings screen.
-
Click the button[
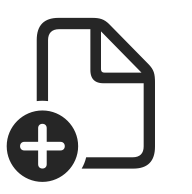 ] on the toolbar on the application screen. (Switch to the task edit screen.)
- Enter each item. (Only "Task Title" is a required field)
- "Priority" is indicated by color coding. If "Discard" is selected, it will be dashed in the Work List screen and will not be included in the tally.
- "Due date" is valid only when the checkbox is checked.
- "Upd date" and "Add date" are automatically entered. They are not manual entry fields.
-
In the "Project name" select box, choose the project to which this work belongs.
At least one project must be added before a task can be added.
-
The value entered in the "Task Title" text box will be displayed in the Work List screen.(It will also be used as the file name when saving data)
Required field. - There is currently no difference in application behavior regardless of which "Work kind" is selected.
- The "Actual time" will be totaled and entered by the application. It is not a manual entry field.
-
The "Estimated time" should be entered in a format such as 99d23h59m.
d represents the day, h represents the hour, and m represents the minute.
So, for example, if the work is scheduled to take two and a half hours, enter 2h30m. - When "Progress" is set to 100%, it is treated as "completed work".
- The "Body" section details this work. (You can change the font in the "Other settings" screen.)
-
After completing the entry, click the button [
 ] on the toolbar on the application screen.
(Each item will be locked and the current time will be automatically entered in the "Upd date" and "Add date" fields.)
This completes the "Add new Task" section. Thank you.
(When you return to the task list screen, you should see the "Task Title" that you added (unless it was excluded by filtering))
- Click on the line of the task you wish to edit in the task list screen. (switch to the task edit screen.)
-
The items are input-locked,
so click the button [ ]
on the toolbar on the application screen to unlock them.
]
on the toolbar on the application screen to unlock them.
- Edit the contents of the item you wish to change. (See "Add new task" for a description of each item.)
-
When editing is complete, click the button
[]
on the toolbar on the application screen.
(The items will be locked again and the current time will be automatically entered in the "Upd date" field.)
This completes the "Update task" section. Thank you.
To cancel editing
Transit to other screens from the task edit screen without clicking on the button
[]
(and the "Add" button).
(Changes will not be saved and the data will return to the data before unlocking.)
(Changes will not be saved and the data will return to the data before unlocking.)
- Click on the line of the task you want to add in the task list screen. (switch to the task edit screen.)
- Enter the information you wish to add in the text box at the bottom of the application screen.
-
After completing the input, click the "Append" button in the lower right corner of the application screen.
(What you have entered in the text box will appear in the center of the screen and the text box will be cleared.
And the current time is automatically entered in the "Upd date" field)
This completes the 'Append task'. Thank you.
There are three ways.
The first is to change the "progress" when ,
The second method is to change the "progress" status when .
(the input lock on the "progress" status will be released when you type something in the text box for the addition).
The third method is to change the "progress" as well when .
(The input lock for "Progress" is released while the timer is running.)
-
Select the slot for the time period you wish to register from the work status bar at the top of the work list screen.
(You can select multiple consecutive time slots by holding down the Shift key and clicking.)
Alternatively, click the button [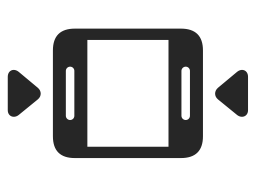 ]
on the toolbar on the application screen
]
on the toolbar on the application screen
to automatically select slots for which no work status has been entered prior to the current time.
(The currently selected slot is indicated by blinking mint color.
The buttons []
on the toolbar on the application screen will also change to mint color.)
-
Click on the line of task you wish to register for the selected time period from the list of work. Multiple tasks can be registered.
(The selected task will be displayed in the table view below the work status bar.
1h is entered in the Actual time column by default, and 1h is evenly divided if multiple tasks are registered.
In addition, the button []
on the toolbar on the application screen will change to red.)
-
If necessary, you can update the default input of Actual time.
Click on a letter in the Actual time column (e.g., 1h) and rewrite it with the keyboard. Enter the text in a format such as 99d23h59m.
-
Click the (now red) button
[]
on the toolbar on the application screen.
(The registration is confirmed, and the selected slot on the work status bar changes from blinking mint color to the project color registered.
(If multiple tasks are registered, the color of the task with the largest percentage of time will take priority. If the time ratio is the same, the task registered first will be given priority.)
The contents of the table view under the work status bar will be cleared.
Also, the buttons []
on the toolbar on the app screen will return to their default colors.
This completes the "Register work status 1(ex post registration)". Thank you.
(The "Actual time" of the individual data of the registered task is also updated (can be checked on task edit screen).)
To cancel registration
Do not click on the (now red) button
[]
on the toolbar on the app screen (flashing mint color),
but click again on the currently selected slot (flashing mint color) to cancel the selection.
(The contents of the table view below the work status bar will be cleared.)
but click again on the currently selected slot (flashing mint color) to cancel the selection.
(The contents of the table view below the work status bar will be cleared.)
- Click on the line of the task you wish to register (to be worked on now) on the task List screen. (Switch to task edit screen.)
-
Click the button
[
 ]
on the toolbar on the application screen.
]
on the toolbar on the application screen.
( []
The color of the button changes to mint.
In addition, the elapsed time since the timer started is displayed in the "Actual time" field, like "+0m". ) - ~1 minute or more of actual work~ (During this time, the application is free to perform other operations, and you may transition to another screen)
-
If necessary, you can also update the "Progress" status.
(The input lock for "Progress" is released while the timer is running.) -
When you are done, click on the (mint-colored)
[]
button.
( The elapsed time that was displayed as "+" will be added to "Actual time", the update of "Progress" will be fixed, and the current time will be automatically entered in the "Upd date".
Also, the button color []
will return to the default color.
)
This completes the "Register work status 2 (pre-input (Timer use))". Thank you.
(When you return to the task list screen, the work status bar should also be updated.)
To cancel registration
Within one minute after the timer starts,
(mint-colored) []
button on the toolbar on the application screen,
the work status will not be registered and will be treated as canceled.
(mint-colored) [
the work status will not be registered and will be treated as canceled.
Basic Operation 2
Click the button
[ ]
on the toolbar on the app screen.
]
on the toolbar on the app screen.
Every time you click,
Every time you click,
- Show only incomplete(blue)
- Show only completed(yellow)
- Show all (default color)
Enter keywords in the search box on the toolbar on the application screen.
Only task that includes keywords in the "title," "body," or "Comment" will appear in the list.
Only task that includes keywords in the "title," "body," or "Comment" will appear in the list.
The project filter in the navigation list on the left side of the screen and the progress filter are also applied separately.
Click on the "Sum (Sum groups): " rounded button in the upper right corner of the work status bar.
Each time you click, the "Sum groups" changes.
("Sum groups" can be registered and edited in "Project settings".)
Each time you click, the "Sum groups" changes.
("Sum groups" can be registered and edited in "Project settings".)
- On the task list screen, click on the line of the work for which you want to open a task file in an external editor. (Switch to the task edit screen.)
-
Click the button
[
 ]
on the toolbar on the application screen.
]
on the toolbar on the application screen.
(An external editor should launch and display the relevant task file)
This completes "Open a task file in an External Editor". Thank you.
(If you overwrite a file in an external editor, changes are automatically detected and the task edit screen is updated to the latest version.)
External editors can change the data in the task file to a format that cannot be read by MighTrack.
Please be fully aware of this when using this function.
Please be fully aware of this when using this function.
- On the task list screen, click on the line of the task you wish to delete. (Switch to the task edit screen.)
-
Click the button
[]
on the toolbar on the application screen to unlock it.
-
Click the button
[
 ]
on the toolbar on the application screen.
]
on the toolbar on the application screen.
-
A confirmation alert box will appear, click the "Delete" button.
This completes the "Delete task" process. Thank you.
The work file is not actually deleted from the OS file system,
but is moved to a folder named "@trash" in the Documents folder of the app's sandbox.
If you really need to delete files, for example, to free up disk space,
delete the files in the "@trash" folder manually from the Finder application, etc., according to the basic operation of the OS.
- Click "Project settings" from the navigation list on the left side of the application screen. (Switched to the project settings screen)
-
Click on the row of the project you wish to delete from the table view at the top of the application screen.
(The data of the selected project will be displayed in the frame in the center of the app screen) - Click the "Delete" button.
-
A confirmation alert box will appear, click the "Delete" button.
This completes the "Delete project" process. Thank you.
(The corresponding "project name" should disappear from the navigation list on the left side of the application screen)
The project folder is not actually deleted from the OS file system,
but is moved to a folder named "@trash" in the Documents folder of the app's sandbox.
If you really need to delete folders, for example, to free up disk space,
delete the folders in the "@trash" folder manually from the Finder application, etc., according to the basic operation of the OS.
- Click "Other Settings" from the navigation list on the left side of the application screen. (Switch to the Other Settings screen.)
-
Check the "Is reflect to calendar app:" checkbox.
This completes the "Reflect to calendar app" setup. Thank you.
Even if this setting is turned on, projects for which "Is reflect to calendar app" is turned off in the project settings will not be linked to the calendar.
Also, the OS must allow MighTrack.app to access the calendar.
OS settings can be found at "Apple Menu" -> "System Preferences" -> "Security and Privacy" -> "Privacy" -> "Calendar".
Also, the OS must allow MighTrack.app to access the calendar.
OS settings can be found at "Apple Menu" -> "System Preferences" -> "Security and Privacy" -> "Privacy" -> "Calendar".
You can change the length of the "Table view under the work status bar" on the work list screen, and the "body input section" and "Comment input section" on the task edit screen.
Move the cursor to the edge of the frame, and when the cursor changes (to up/down arrows), drag to change the size to your liking.
If you are having trouble resizing, try moving it in the opposite direction and then dragging it in the desired direction.
Move the cursor to the edge of the frame, and when the cursor changes (to up/down arrows), drag to change the size to your liking.
If you are having trouble resizing, try moving it in the opposite direction and then dragging it in the desired direction.